How to Tread Water in 3 Simple Steps
Written by Nyra Naheedy — 10 min read

How to Tread Water in 3 Simple Steps
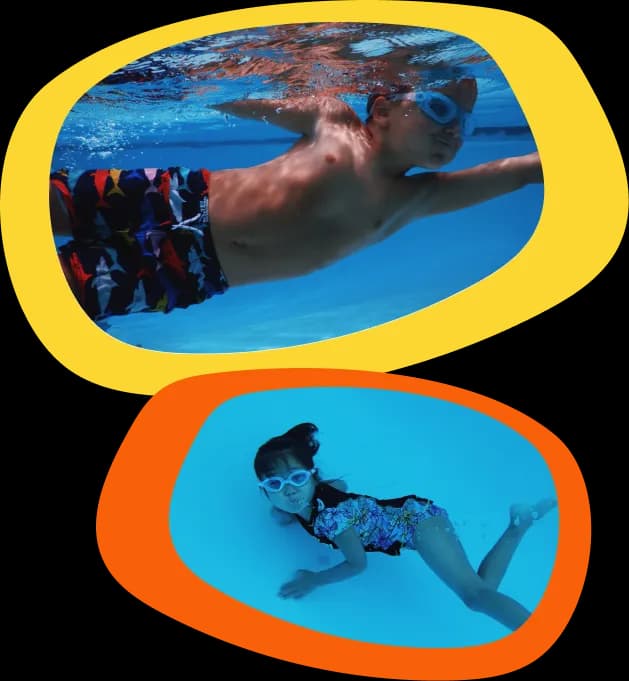
Treading can come easy to some kids and adults, but to others it is an arduous task. Scientifically speaking, learning to tread water may come less easily for students with higher bone or muscle density, and less fatty tissues. However, despite any physical disadvantages, there are ways for everyone to tread successfully while minimizing physical exertion!
Learning how to tread is an incredibly important skill for swimmers. Sometimes, the ability to tread can mean the difference between life and death. While learning different types of strokes are useful for emergency situations in which you need to reach a point and exit the water, treading is useful for emergency situations where there may be no plausible exit, or if you’re required to stay in the water while waiting for assistance.
Swim strokes get you from point A to B, whereas treading is the most efficient method for staying in place, and saving your strength - next to back floats that is! So how does one tread water? Let’s explain it in three easy steps!
How to Teach a Child to Tread Water (or Adult):
STEP 1: KICK
Contrary to popular belief, the best kick for treading water is not the freestyle, aka “flutter” kick. Instead try having your child do what is popularly known among instructors as, the egg-beater kick. The egg-beater kick is named after what it looks like, an egg-beater. It’s commonly used for treading among those with experience because it’s proven to be more efficient and less exertive than other kicks. So here’s how to do it!
Have your child begin in water that is deep enough to tread in. This means water deep enough where your child cannot touch the bottom of the pool, or is only able to do so while standing on their tip toes. It helps to do this near a pool edge, where your child can always grab onto something in reach in case they need to. Have your child bend their knees up towards their chest at a 90 degree angle, like they’re sitting in a chair. Their back should be straight. From this position, have your child rotate their left foot, from the knee on down, in a clockwise circular movement. Have them then rotate their right foot, from the knee on down, in a counter-clockwise circular movement. The feet and legs should never meet - when one foot is centered, underneath the body, the other foot should be on the outside part of its circular rotation, roughly in line with the child’s shoulder or even slightly outside their frame. The movement should originate from the knee, meaning your child’s knees on up should be stationary and not moving.
I find it helps to show students what an actual egg-beater looks like in slow motion. If you have an egg-beater, pull it out and let them visually observe how each wisk rotates in their own clockwise and counter-clockwise directions, and how the two work together with one rotating inwards with the other rotating outwards simultaneously. There are also tons of egg-beater kick Youtube videos at your disposal to help your little ones who may understand this better with a visual aid. Once your child is performing the egg-beater kick as it should properly be done, proceed to Step 2!
STEP 2: SCULL
A lot of swim school frameworks involve teaching treading at a later stage in their programs, or at a higher level. This makes sense, as treading requires students to be in water which is deeper than they are tall, and for a lot of students this would be a terrifying place to begin learning how to swim! However, this can cause some issues when it comes to learning how to tread. The most common problem I see with students struggling to tread, is that they utilize the same arm movements that they’ve been practicing throughout their lessons, i.e. freestyle and backstroke movements. Those arm movements, however, are meant for moving from point A to point B in a horizontal position. With treading, you don’t want to move from one place to another, but to keep yourself in an upright and stationary position. This means that those freestyle and backstroke arm movements will not be much help here! I like to have children stand outside the water to practice their treading arm movements first, as it gives both them and you a better idea of what your child is doing, without having to view it through the water. This also alleviates the added stress that students may have - attempting to perform while also trying to stay afloat. So what do the arm movements for treading look like?
Sculling uses Quick Horizontal Movements of the Hands
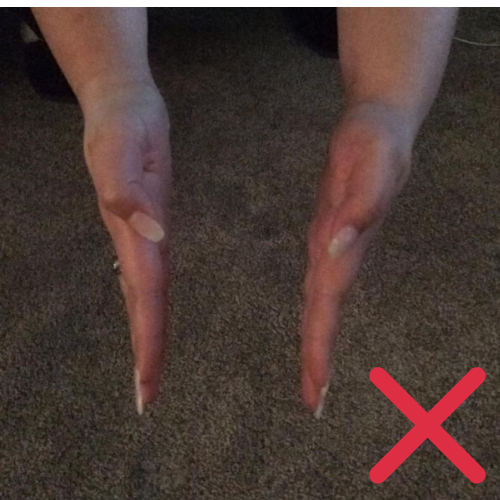
First and foremost, the arm movement for treading is commonly referred to as “sculling”. Sculling is used in other drills for more competitive swimmers, but it’s first and foremost use is for treading. Have your swimmer begin outside the pool standing or sitting. I would suggest having them sit on the edge of the pool, as this let’s you see their arm movements while also getting your swimmer used to having the rest of their body in the same position they’ll utilize for treading. Next, have them hold up both their arms away from their body, as though they’re forming a letter “T”. Then, make sure your swimmer has all of their fingers together, and not spread apart. They should somewhat cup their hands, so that their hands are not flat but also not overly cupped. I’ve included pictures below to show what their hands should look like.
The last step is easy! Have them move their arms forward and backwards, pushing the water away while moving forward, and pull the water back while moving backwards. Make sure your swimmer is not locking their elbows, as this can cause unnecessary strain on those joints. Instead, their arms should be relaxed and slightly bent. Note that the arm movements for treading can vary. If your swimmer wants to improvise, let them! The essential aspect of sculling is to be moving the water back and forth in a way that allows you to be stationary, and doing horizontal arm movements as opposed to vertical. Horizontal arm movements just below the surface of the water, as opposed to vertical movements like used in freestyle or backstroke, require less physical exertion and are therefore less likely to tire your swimmer out!
Personally, I don’t have a typical arm movement; it varies every time I get in the water. I do sometimes scull in an egg-beater fashion, but with my arms spread wide enough that my hands can simultaneously be centered with my body and simultaneously away from my body. There’s no “right” way to scull, only “wrong”!
Time to Practice Your New Sculling Swimming Skills
Once your swimmer has conquered their sculling movements on the pool edge, it’s time to move back into the water and practice them there. Have your child begin in the shallow end of the pool where they can stand and practice. This lets your child understand the concept better than when they were practicing on the edge of the pool. In the water, they will better comprehend the “pushing” and “pulling” of the water, something they’re unable to feel while practicing with air. After that, you’ll step back into the deep end and combine the sculling arm movements with the egg-beater kick. Now, you may think, well, what else is there that warrants a third step to this process? And the answer is something I didn’t think about until I had a student who was successfully performing steps 1 and 2, but was still struggling to tread for longer duration's. See Step 3 for the answer!

STEP 3: BREATHE
You may think, well no duh! Breathing is something you do without thinking about! But the truth is, when you’re teaching young or even older swimmers how to tread, there are still the aspects of fear and safety at play. You’re putting your child in a position where they can no longer touch the bottom of the pool, and that can be very scary for a beginner! Let me tell you the story about how I discovered that treading may be doable in just two steps for some, but for others, this third step may make-or-break their tread!
A few years ago I had a teenage boy enroll in private swim lessons. His father explained to me that he was capable of swimming a lap without stopping, but his endurance was lacking. He also did not know how to tread, and that’s why he enrolled in lessons. My student wanted to attend a summer boating program at a well-known academy with a prestigious reputation. But one of the requirements was the ability to tread water for five minutes, without help and without struggling. So, he came to me.
At our first lesson, I had him hop in and show me a lap of freestyle, and then pulled out a stopwatch to see how long he could tread for. His stroke wasn’t perfect, you could tell he was uncomfortable getting his head in the water as he swam with his head upright the whole lap. His treading was much worse; he was only able to tread for 3.4 seconds before panicking and reaching out for something to grab onto. I told his father we’d work on it, there were definitely some things I could do to help him improve his time.
Treading Water is an Important Skill to Be Relaxed in the Water
So, we began with Steps 1 and 2, the egg-beater kick and the arm movements. By the third lesson, we had nearly mastered those steps and his time had gone up to roughly a minute and a half. But he still had little endurance and was running out of breath, forcing him to give up before he could get to two minutes. I was surprised by his lack of endurance, because my student had the body of an athlete; he was extremely in shape, plenty of muscle but not so much that it would be more of a detriment than a benefit (muscle is far denser than fat, so too much muscle and treading can be easily more difficult). I watched and I watched, thinking, he’s doing everything right, why is running out of breath?
Finally, I decided to stop watching his movements below the water, and watched only his face and everything happening above the water. Quickly I realized the following: towards the end of his effort, he was noticeably overwhelmed and exhausted. It was like watching someone finish a 50-yard sprint, expending every last bit of energy he had so he could “finish strong”. And therein lies the problem. Treading water is not a sprint. It’s a marathon.
If you’ve ever trained for a marathon, you know that learning how to pace your breathing is every bit as important as learning how to pace yourself. Your swimmer needs to learn how to be relaxed in the water while treading; they should not be tightening their muscles and using up unneeded energy. The principle behind treading is to put out the minimal amount of energy required to keep you upright and breathing in oxygen for as long as possible. So if your child is struggling with this concept, here’s some tips on how to improve their breathing.
First, tell them to relax. I know telling someone to relax hardly ever actually makes them relax, but it is useful to remind them when they’re not relaxing, and that it’s part of why they may be continuing to struggle. Second, make sure they’re breathing through their mouth, and not their nose. Not all swimmers need to do this; I for one am easily capable of treading while breathing through my nose, but for swimmers who seem to be running the sprint instead of the marathon, opening their airway to the fullest extent possible can be a big help.
With my student, I instructed him to do both of those things, but it still made no impact. Finally I realized that my, “open your mouth and breathe through it instead of your nose” command, was not solving the problem I intended it to solve. Saying, “open your airway and establish a breathing pattern”, was not solving the problem either. So, I further instructed him to stick his tongue out as far as he possibly could while treading. And boom! Problem solved!
I know it sounds weird, but having my student stick his tongue all the way out helped him “feel” and therefore understand what I meant when I said to “open your airway”. After that lesson, which to be honest, was quite amusing to watch, he did not need to tread with his tongue sticking out again. By the end of our first full lesson with the added breathing step, my student’s time had jumped from about a minute and a half to fifteen minutes!! At the lesson after that, we successfully treaded the entire thirty minutes! Needless to say, he excitedly made it into his boating program that summer. Treading is possible for almost everyone. Just remember to kick, scull, and breathe, and treat it like a marathon, not a sprint! Just keep treading. :)
Need more help from a private swim instructor? Enroll in private lessons at your own home or community pool today with a Sunsational Swim Instructor!
Nyra Naheedy’s bio:
Swim Instructor in Chicago, IL
Hello! My name is Nyra and I am a 25 year old law school graduate who is preparing to take the bar exam. I have an extensive swim background involving 15 years of competitive swimming experience and nearly a decade of teaching and coaching experience. I have taught all age groups, from babies to seniors, and have worked as a supervisor for lesson programs in my area. I've found that my law school experience has actually benefited me as a swim instructor, as it's caused me to think more critically about what my swimmers are doing wrong, why they do it, and how to change those behaviors so they can successfully become better swimmers! Swimming is an amazing skill set, and an important one! And I love being able to help others improve and develop those skills!
Share on socials